Quickstart
This guide gets a minimal dcvix deployment running on a single Linux server with one agent workstation.
1. Install the Director
# Debian / Ubuntu
sudo dpkg -i dcvix-director_<version>.deb

# Rocky Linux / RHEL
sudo rpm -i dcvix-director-<version>.rpm
On first startup the director auto-generates its CA, server certificate, and creates the SQLite agent database.
Important: The server certificate's CN/SAN is set from
hostname -f. Agents verify this against the hostname they use to reach the director - they must match or agents will reject the connection.
2. Configure the Director
Edit /etc/dcvix-director/dcvix-director.conf:
[director]
director_host = "0.0.0.0"
director_port = 8445
auth_type = "pam"
policydb_folder = "/etc/dcvix-director/policydb"
data_dir = "/var/lib/dcvix-director"
Create a minimal policy file so the launcher user can see servers:
mkdir -p /etc/dcvix-director/policydb
# /etc/dcvix-director/policydb/users.json
[
    {
        "UserID": "your-username",
        "Workstations": ["agent-hostname.domain.com"],
        "Pools": []
    }
]
# /etc/dcvix-director/policydb/pools.json
[]
3. Start the Director
sudo systemctl enable --now dcvix-director
Check the logs:
journalctl -u dcvix-director -f
Look for the CA fingerprint and a line confirming the server started on port 8445.
4. Install the Agent
On a workstation with Amazon DCV installed:
sudo dpkg -i dcvix-agent_<version>.deb
5. Configure the Agent
Edit /etc/dcvix-agent/dcvix-agent.conf:
[agent]
director_host = "<director-ip-address>"
director_port = 8445
tags = "production, linux"
6. Start the Agent
sudo systemctl enable --now dcvix-agent
The agent generates an Ed25519 key pair, creates a UUIDv4 GUID, and starts polling the director's /v1/agent/register endpoint every 30 seconds.
Check the logs:
journalctl -u dcvix-agent -f
Expect to see: "Registration: pending approval (GUID: ...) - pending approval"
7. Approve the Agent
Open a browser and navigate to https://<director-ip>:8445/admin/agents.
Log in with your admin credentials.
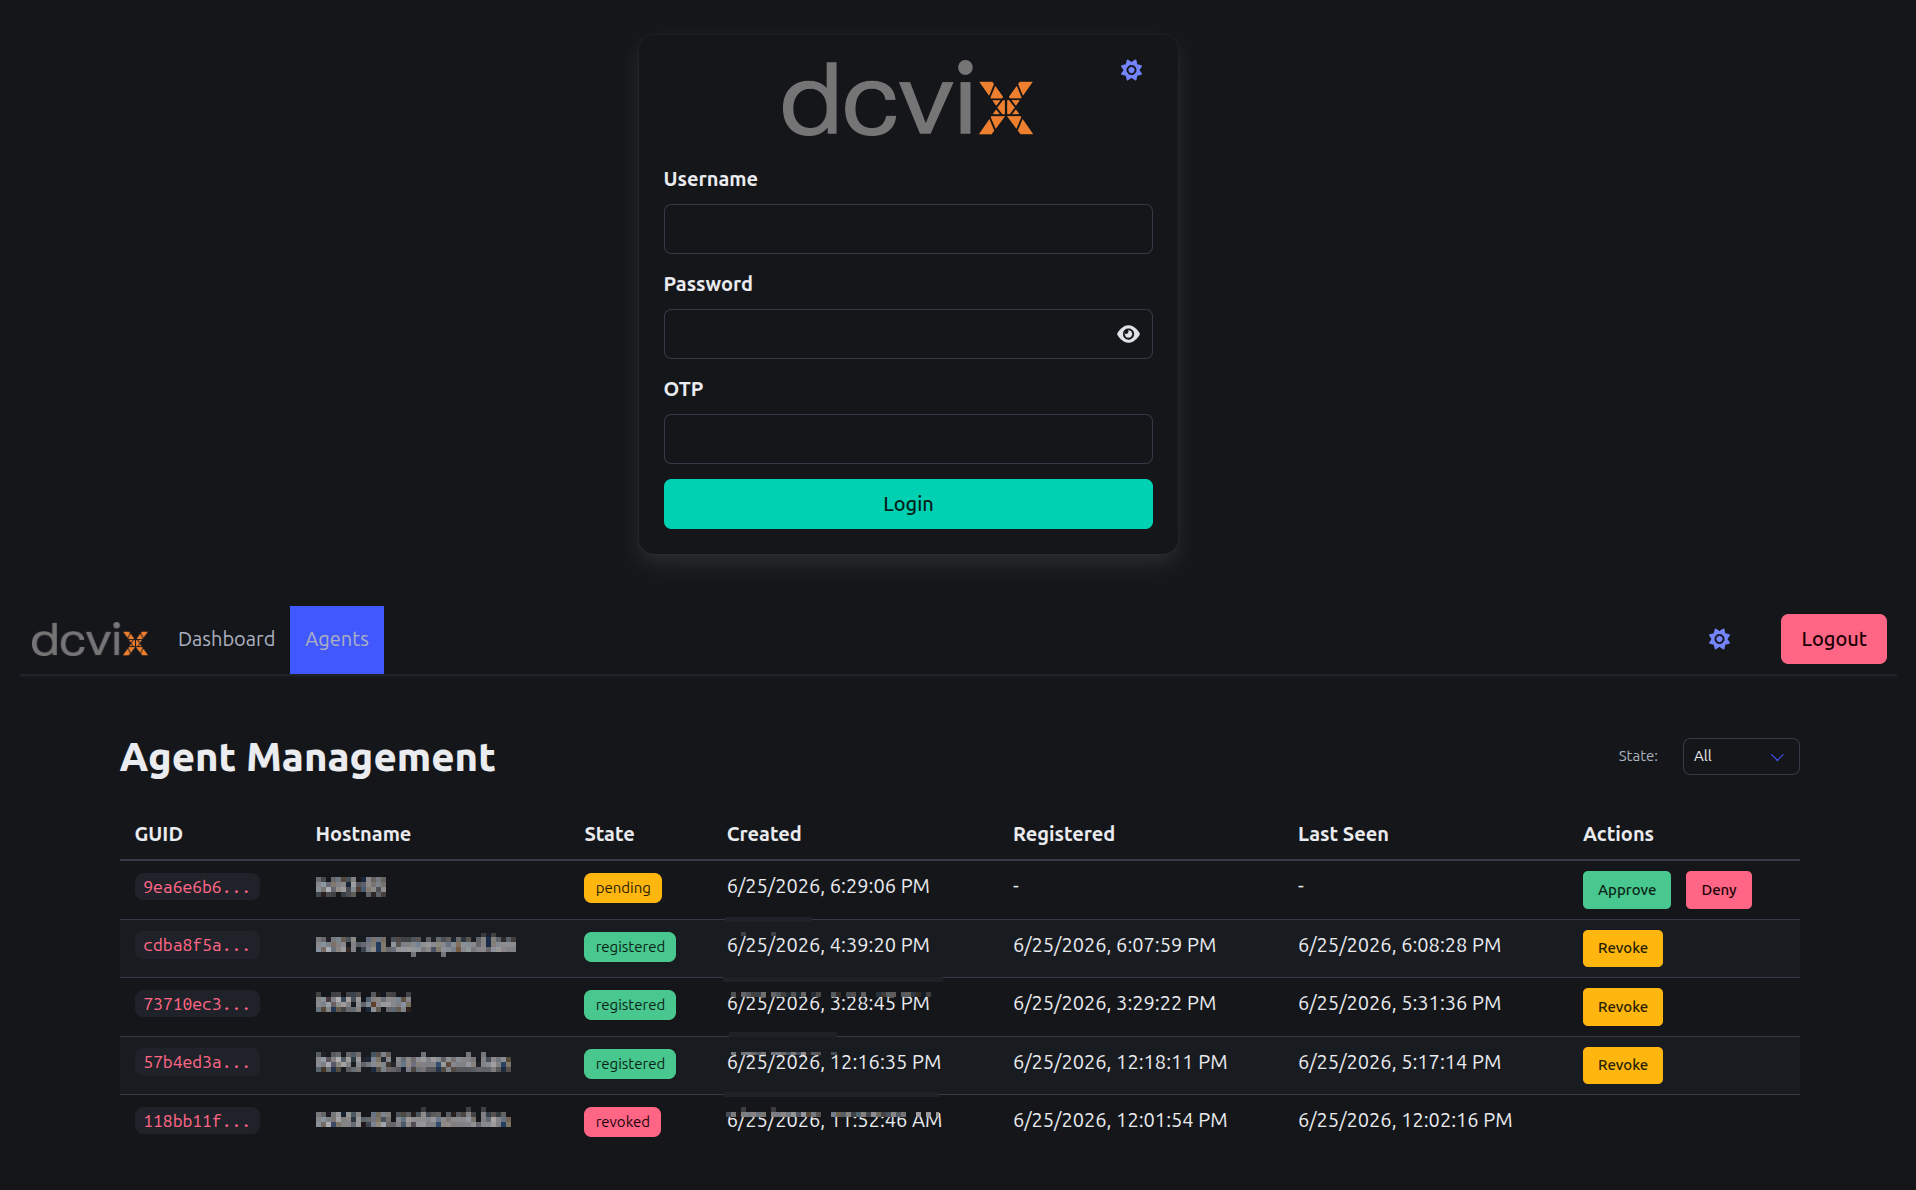
Click Approve on the pending agent entry. The agent receives a signed certificate and switches to strict mTLS.
8. Install and Configure the Launcher
On your desktop, run the launcher installer or binary. On first run it creates a default config at the user config directory. Edit it to set your broker:
- Linux:
~/.config/net.cortassa.dcvix-launcher/dcvix-launcher.conf - macOS:
~/Library/Application Support/net.cortassa.dcvix-launcher/dcvix-launcher.conf - Windows:
%AppData%/net.cortassa.dcvix-launcher/dcvix-launcher.conf
[dcvix-launcher]
broker=https://<director-ip>:8445
otp=False
command="dcvviewer"
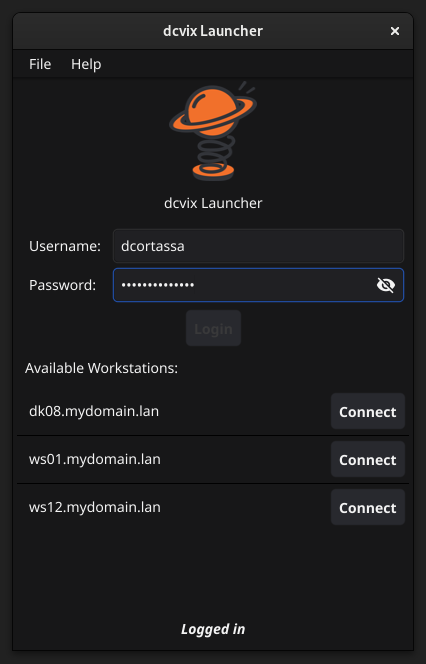
9. Connect
Launch the GUI, enter your credentials, and you should see the agent workstation listed. Select it and click connect.
What's next?
- Installation guide - platform-specific install details
- Configuration overview - all available options
- Architecture overview - understanding the system